How to Repair Asphalt Shingles and Roof Leaks
by N Turner |October 13, 2018
Roofing Specialists Northwest – Blog
When a shingle is broken, it can allow a significant amount of water into your home. In many cases, you do not need to replace the entire roof, simply because a small number of shingles are broken. You may not even have to replace all of the damaged shingles at all. Going through the simpler process first can save you time and money, as opposed to going all out from the beginning.
Are Shingles Damaged Frequently?
Roofing shingles are surprisingly easy to damage. All it takes is a falling tree limb, a high wind, or a nail that was put in a somewhat wrong place to make damage an inevitable occurrence. Even though a set of shingles may indicate that they are rated for a certain number of years, this is only a base guideline if no special events occur to damage the shingles.

How to Identify a Damaged Shingle
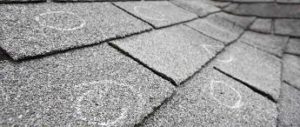
A damaged shingle is a relatively easy thing to spot. If some of the nodules have come off, it can be damaged enough that water will leak through it. If there is a smooth or shiny spot, that particular shingle is no longer serving its full intended purpose. As well, any kind of crack or break in the shingle means it is not working as intended anymore.
The Shingle or the Tab
Shingles can be relatively large and are divided into tabs that can be identified separately from each other. In some cases, you may need to replace the entire shingle. In other cases, simply replacing one of the tabs may be enough. There is no sense replacing more than you need to if the damage is only minor or highly localized.
To Replace a Shingle
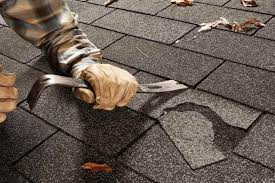
To start, use a putty knife to separate the shingle from its seal. Then use a flat bar to pry it up and remove the nails that hold it in place. Be mindful of potentially damaging the shingles above and below it. Then either remove the entire shingle or use a utility knife to cut away the tab that is damaged.

Once you have space opened up, you can make sure you have the right size of replacement. Once you have this, secure it into place under the shingle above it using 7/8 inch roofing nails. Then place a small amount of roofing cement underneath to hold it down tightly.
When the Shingle is Not the Problem
In some cases, the flashing is the problem instead of the roof shingles themselves. In these cases, it is important to thoroughly check the flashing itself to see if there are any rust spots, cracks, holes or any other potential breach points. It is also important to check to see if there have been attempts to repair the breach in the past.
Trying to patch a part of the flashing with roofing tar, caulk or most other substances is not a long-term solution, even though it is used as a popular method among homeowners. These types of “repairs” typically fall through and end up needing the skills (and tools) of a professional roofer to repair all damages. If you’re experiencing a Roof Leak in Lynnwood, be sure to check out the roofing professionals here.
